Home › Vegetables › Mint
Vegetables
Growing mint
Mentha spicata. A tough, long-lived perennial herb grown for its fresh, cool-flavoured leaves, picked from spring to autumn for years. Peppermint (Mentha × piperita) is grown the same way. It wants sun or part shade and soil that stays moist, and it spreads fast by runners under the ground, so it is best kept in its own pot. These steps work anywhere: they go by soil and weather, not by month. Also called spearmint (everywhere, and the usual name in the US), garden mint (UK).
New to growing vegetables? Start with the beginner's guide.
How mint grows
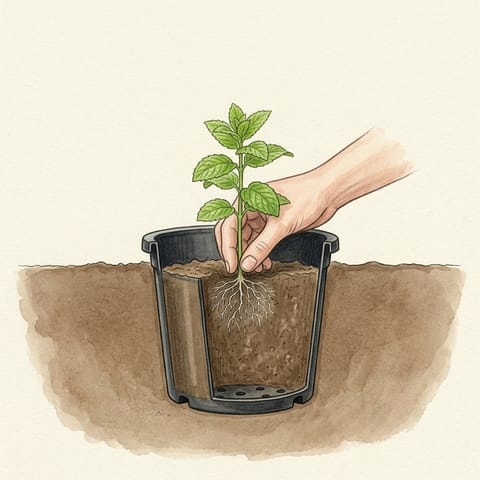 PlantA young plant in a container sunk in the bedDay 0
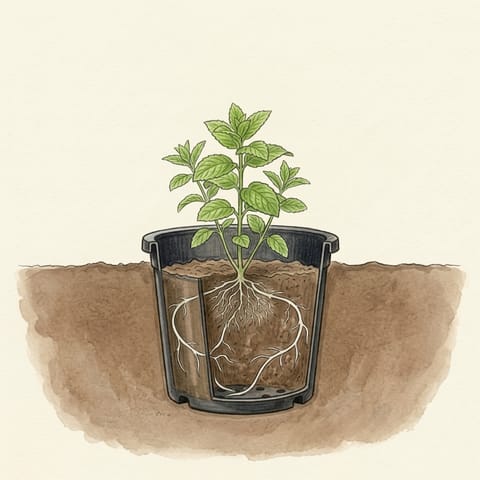 Settle inNew shoots; roots and runners spread2–4 weeks
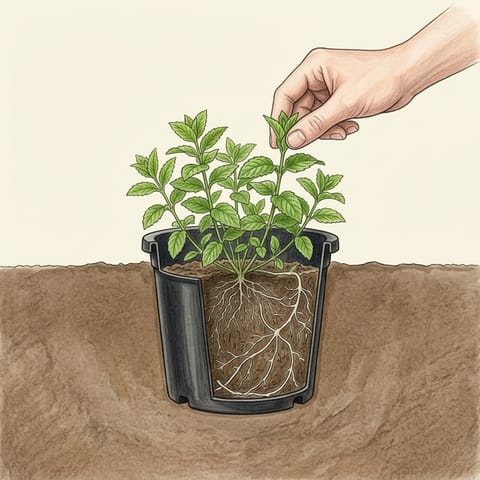 First picksShoot tips pinched off for the kitchenAbout a month after planting
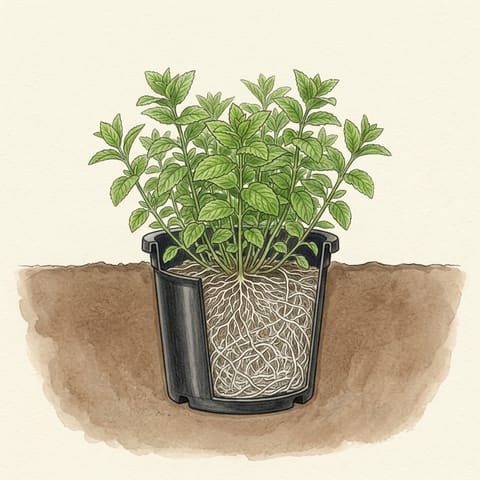 BushyRegular picking keeps it full; runners fill the container2–3 months
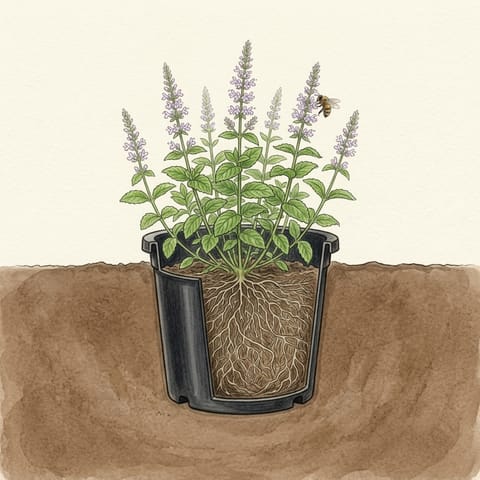 FlowersSpikes of small lilac flowersSummer
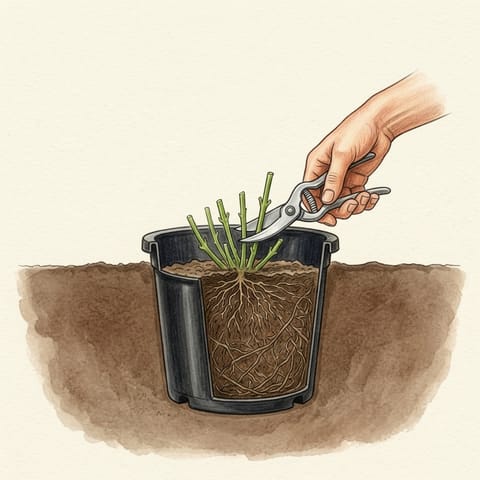 Cut backThe whole plant cut to 5 cm after floweringAfter flowering
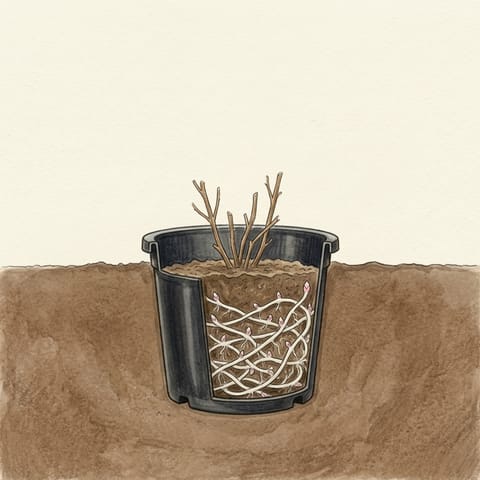 WinterTops die down; the roots wait belowLate autumn to winter
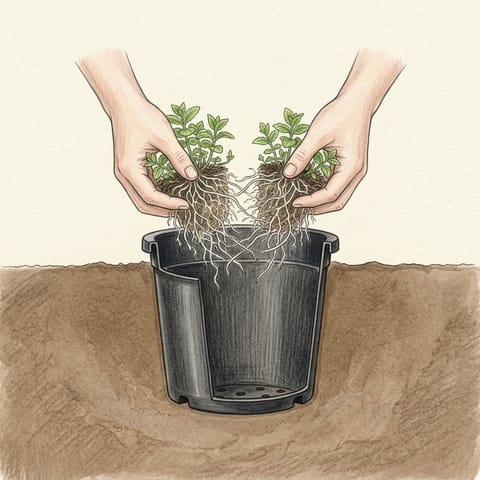 DivideLift, split and replant young piecesEvery 2–4 years, in spring
Times run from planting a young plant in spring and vary with the weather. A plant set out in autumn settles in over winter and comes away strongly in spring.
Growing it, step by step
Is it right for you?
- Mint is a hardy perennial grown for its leaves. Spearmint, the common garden mint, is the one for mint sauce and cooking; peppermint has a stronger, sharper flavour and is grown the same way.
- It is very tough: in cold winters the tops die down and it grows back in spring. A plant usually grows 30–60 cm (1–2 ft) tall, taller in rich, moist soil.
- It spreads fast by white runners under the ground and can take over a bed, so grow it in its own pot, or in a bottomless container sunk into the bed.
- In a pot: at least 30 cm (12 in) wide, with drainage holes, in sun or part shade. Pots dry out quickly, so a spot out of the hottest afternoon sun helps.
- It also grows indoors on a bright windowsill or in an indoor growing kit, picked little and often.
When to plant
Plant a young plant at any time the ground can be dug and isn't frozen or waterlogged. It settles in best in spring or autumn, when the soil is moist and the weather mild. Start from a bought plant, a rooted piece from a friend's clump or a cutting: mint grown from seed often isn't true to its parent, and peppermint rarely sets seed at all.
Cold winters: plant in spring. It dies down to the ground in winter and comes back; pot up a piece in autumn for a sunny windowsill and winter picks. Mild climates: plant in spring or autumn. It grows for most of the year and only slows or dies back a little in winter. Hot or subtropical places: plant in autumn or early spring, give it afternoon shade, and keep it moist through summer. Cut it back if it turns tired in the heat. Tropics: part shade and steady moisture, with room for air to move. A pot is easy to shift out of heavy rain and the hottest sun.Prepare the bed
- Full sun or part shade, in rich soil that holds moisture but drains well. Dig in compost before planting. It copes with most soils except dry ones.
- Soil near neutral suits it, about pH 6.0–7.5. See soil pH.
- In the bed, sink a large bottomless container, or an old pot with its base cut out or with big drainage holes, at least 30 cm (12 in) deep, with its rim a few centimetres (an inch or two) above the soil so runners can't creep over the top.
- In a pot, use good potting mix, not garden soil.
- Keep mint out of soil where mint has had wilt or bad rust before: both last in the ground.
Plant
- Plant a young plant at the same depth it sat in its pot, in the middle of its pot or sunken container, and firm the soil around it.
- In open ground, space plants 45 cm (18 in) apart, but expect them to fill the gap and keep going.
- To make new plants, pull off a piece of runner with roots and a shoot or two and plant it 5 cm (2 in) deep. Soft stem tips also root in a jar of water within a couple of weeks, then go into a pot.
Get it started
- Water in well, then keep the soil moist, not wet, while the plant settles over the first few weeks.
- Pinch out the tips once it is growing strongly, to make it bushy.
- Weed around it by hand while it is small.
Keep it growing
- Pick: pick the young shoot tips often, from spring to autumn. Regular picking keeps fresh, tender leaves coming.
- Water: keep the soil moist; mint doesn't like drying out, but it rots in soil that stays wet. Water at the soil, in the morning, so the leaves dry by night. Pots need water more often, daily in hot weather.
- Flowers: spikes of small lilac flowers come in summer and early autumn. Bees love them, but the leaves lose flavour once it flowers. Pinch the spikes off as they show for the best leaves.
- Cut back: after flowering, or whenever it looks tired, cut the whole plant down to about 5 cm (2 in) above the soil. Fresh shoots come within a few weeks.
- Feed: good soil needs little: a layer of compost around it each spring. In pots, a weak liquid feed every four weeks in spring and summer. Too much feeding grows soft leaves that rust easily.
- Winter: where winters are cold, the tops die down. Cut the old stems to the ground any time from late autumn until just before the new shoots come in spring.
- Divide: every two years or so in a pot, and every three or four years in the ground, the clump gets crowded and bare in the middle. In spring or autumn, lift it, throw out the old centre, and replant young pieces from the edge in fresh soil or potting mix.
Watch for problems
The common ones, with a Garden help page each where there is one:
Harvest
- Start picking once a young plant is growing strongly, about a month after planting, when the shoots are 10 cm (4 in) or more tall.
- Pick the soft shoot tips, just above a pair of leaves: they have the best flavour, and the stem branches from there.
- For a bigger bunch, cut whole stems to about 2.5 cm (1 in) above the soil. A clump gives two or three such cuts a season.
- To dry or freeze a lot at once, cut just as the flowers begin to show, on a dry morning.
- Where winters are cold, pot up a piece in autumn and keep it on a sunny windowsill for leaves through the winter.
After harvest
- Stand cut stems in a jar of water and use them within a few days, or keep them in the fridge for up to a week.
- Freezing keeps the flavour better than drying: freeze chopped leaves in an ice cube tray topped with water. Dried leaves keep in an airtight jar for up to a year.
- If rust shows (orange, then dark spots under the leaves), cut the affected stems to the ground and bin them. If it comes back every year, start again with a healthy plant in fresh soil somewhere else.
- A clump stays good for years if it is divided every few years. Once it is crowded, woody and bare in the middle, divide it or replace it with a young piece.
- Next in that bed: keep mint in its own pot, or a sunken pot, so the bed stays free. If you dig a mint patch out, sift out every scrap of white runner and watch for new shoots for a season: any piece left behind regrows.
Sources (5, from RHS, Utah State University Extension, University of Illinois Extension and others)
- RHS: How to grow mint
- Utah State University Extension: Mint in the garden
- University of Illinois Extension: Mint
- NSW Department of Primary Industries: Mint growing
- Gardening Australia: Mint refresher
Facts checked Friday 30 October 2026. General guidance only: local advice comes first.