Home › Vegetables › Chives
Vegetables
Growing chives
Allium schoenoprasum. A hardy perennial herb in the onion family, grown for its grassy, mild onion-flavoured leaves and cut again and again for years. Its purple flowers are edible too. It wants sun or light shade and soil that holds moisture but never stays wet, and a clump is lifted and divided every few years to keep it young. These steps work anywhere: they go by soil and weather, not by month.
How chives grow
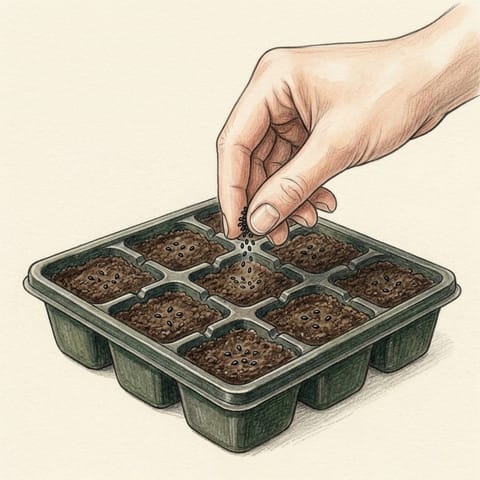 SowA pinch of seeds in each cellUp in 1–3 weeks
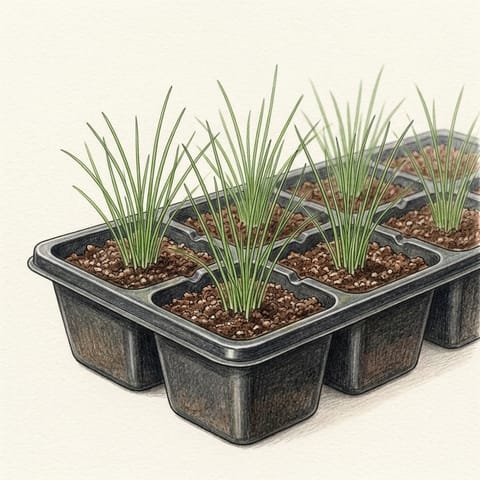 SeedlingThin, grass-like leaves in little clumps4–6 weeks
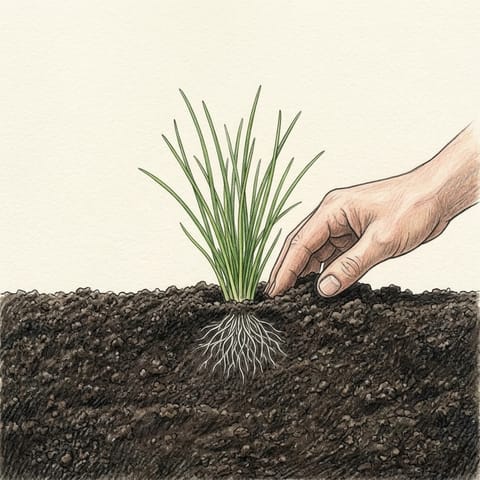 Plant outA little clump, at the same depth6–8 weeks from sowing
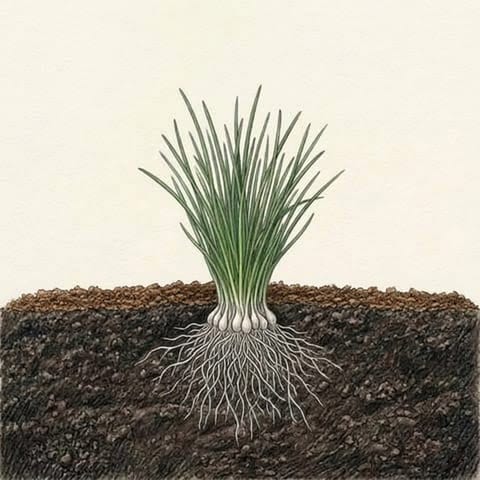 GrowThe clump thickens; thin compost mulch1–2 months after planting
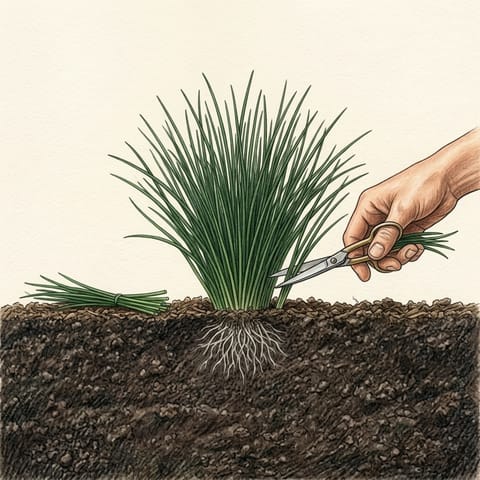 CutLeaves cut to 5 cm above the soilAbout a month after planting, then monthly
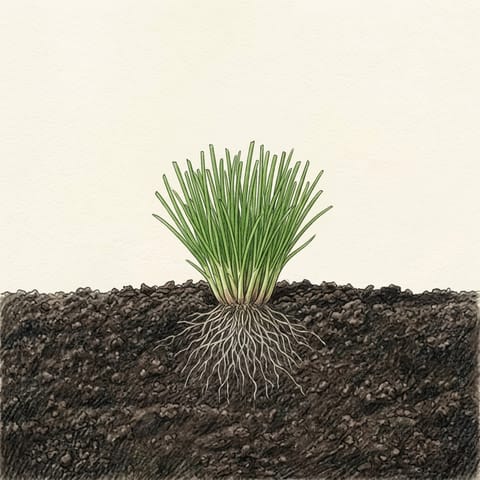 RegrowFresh leaves grow from the stubs3–4 weeks after each cut
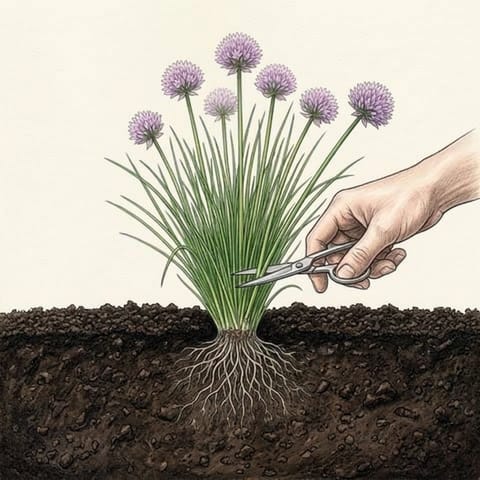 FlowersPurple pompoms; stalks cut at the base afterLate spring to summer
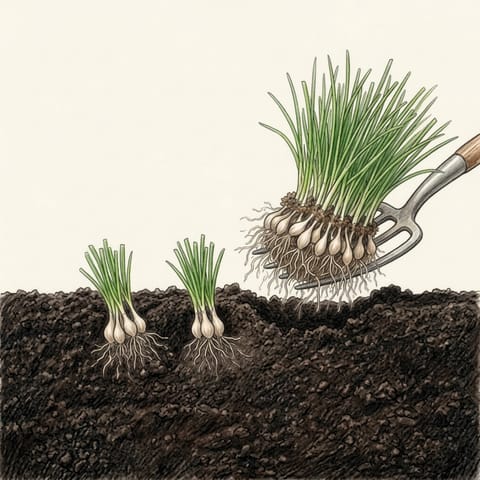 DivideLift and split the clump, then replantEvery 3 years or so
Times run from sowing and vary with the weather. A bought plant or a piece of a friend's clump skips the first three stages and can be cut about a month after planting.
Growing it, step by step
Is it right for you?
- Chives are a hardy perennial in the onion family, grown for their thin, grassy leaves with a mild onion flavour. One clump gives leaves for years, cut and cut again.
- It is very cold-hardy. Where winters are cold, the leaves die down and the clump grows back in spring. In mild places it may stay green most of the year.
- A clump spreads to about 30 cm (12 in) across and 30 cm (12 in) tall. It also grows well in a pot at least 20 cm (8 in) wide and deep; wider is better.
- Garlic chives, with flat leaves, a garlic flavour and white flowers, are a different plant grown much the same way.
When to plant
Sow in spring once the soil has warmed to about 10°C (50°F), or indoors a few weeks earlier in a warm, bright spot. The seed is slow to come up and the seedlings take a couple of months to make a clump worth planting. The easiest start is a bought plant or a piece split off an older clump, planted in spring, or in autumn where winters are mild.
Cold winters: sow or plant in spring. It dies down in winter and comes back; pot up a clump in autumn and bring it indoors for winter leaves. Mild climates: sow in spring; plant or divide clumps in spring or autumn. It may keep some leaves through winter. Hot or subtropical places: sow and plant as the weather cools in autumn, cut through the cooler months, and give it afternoon shade in summer. Tropics: the cooler, drier months, in light shade. A pot is easy to move out of heavy rain and the hottest sun.Prepare the bed
- Full sun or light shade, in fertile soil that holds moisture but drains well. Dig in compost before planting.
- Chives rot in soil that stays wet. On heavy clay soil, use a raised bed or a pot.
- Weed the bed thoroughly before you plant: grass and weeds that creep into a clump are hard to get out later.
- Avoid a bed where white rot has been. It lasts in the soil for years and attacks chives as it does onions and garlic.
Sow and plant
- Sow a small pinch of seeds in each cell of a module tray or small pot, 5 mm–1 cm (¼–½ in) deep. Keep them warm, bright and damp, not wet.
- Plant the little clumps out once they are about 10 cm (4 in) tall. Harden them off first for a week or so: outside by day, in at night.
- To sow straight into the bed, sow thinly in a shallow row at the same depth, and thin to small clumps 20 cm (8 in) apart once the seedlings are big enough to handle.
- Plant bought plants and divided pieces at the same level they grew before, 20 cm (8 in) apart, in rows 30 cm (12 in) apart.
Get it started
- Water in well. Keep sown seed damp every day until the seedlings show, and water new plants daily for the first week or so while they settle.
- Weed by hand, carefully: the roots are shallow, and weeds matter most in the first two months.
- Let new plants settle for about a month before the first cut.
Keep it growing
- Cut: from about a month after planting, cut the leaves to about 5 cm (2 in) above the soil and use them. Do it about once a month through the growing season: regular cutting keeps fresh, tender leaves coming.
- Flowers: round purple flowers come in late spring and summer. They are edible and bees love them. Once they fade, cut the stalks off at the base so it doesn't self-seed. You can also cut the whole clump back to 5 cm (2 in) for fresh leaves within a few weeks. For the most leaves, cut the flower stalks off as soon as they show.
- Water: keep new plants moist through their first summer. Established clumps in the ground rarely need water except in long dry spells: then give a good soak at the soil about once a week. Pots dry out fast and need watering more often.
- Mulch: a thin layer of compost, about 3 cm (1¼ in), around the clump. In later years, add another each late winter or early spring, before the new leaves come.
- Feed: good soil needs none. If you cut it hard and often, a light liquid feed in spring and again in midsummer is plenty. In pots, a weak liquid feed every four weeks in spring and summer.
- Divide: every three years or so, when a clump grows crowded and its leaves thin, lift it in spring or autumn and split it into pieces of a few small bulbs each. Replant them, water them in and let them settle for a few weeks before cutting again.
Watch for problems
The common ones, with a Garden help page each where there is one:
Harvest
- Start cutting once a plant is growing strongly: about a month after planting, or two to three months after sowing. In the first year, cut lightly, three or four times.
- Cut a bunch of leaves at a time with scissors, 2.5–5 cm (1–2 in) above the soil, rather than snipping the tips. The cut leaves grow back from the base.
- Pick the flowers to eat when they have just opened, and pull them apart into little florets for salads.
- Use the leaves raw, or add them at the end of cooking: heat destroys their flavour.
- Where winters are cold, pot up a small clump in autumn and keep it on a bright windowsill for leaves through the winter.
After harvest
- Fresh leaves don't keep long. Stand cut leaves in a jar of water, out of the sun, and use them within a few days.
- To keep them longer, freeze them chopped, in an ice cube tray topped with water. Dried chives lose their colour and most of their flavour.
- Where winters are cold, the leaves die down in autumn. Clear away the dead leaves, and the clump grows back in spring.
- If white rot shows up (leaves yellow and collapse, with white fluffy mould on the bulbs at the base), dig out and bin the clump and keep the onion family out of that bed: it can last in the soil for 20 years or more.
- Next in that bed: once a clump is lifted for good, the cabbage family, beans or peas. Keep chives, onions, garlic, leeks and shallots out for three or four years.
Sources
- RHS: How to grow chives
- Utah State University Extension: Chives in the garden
- University of Illinois Extension: Chives
- Sustainable Gardening Australia: Chives
- Washington State University Extension: Pacific Northwest Gardener's Handbook, vegetable gardening
Facts checked Friday 23 October 2026. General guidance only: local advice comes first.